

The Custom Fields page
Configure → Custom Fields lists every field in your organization, with how many mappings each has, its category and model, and who last changed it.Step 1: Create the field
Click New Field in the top right.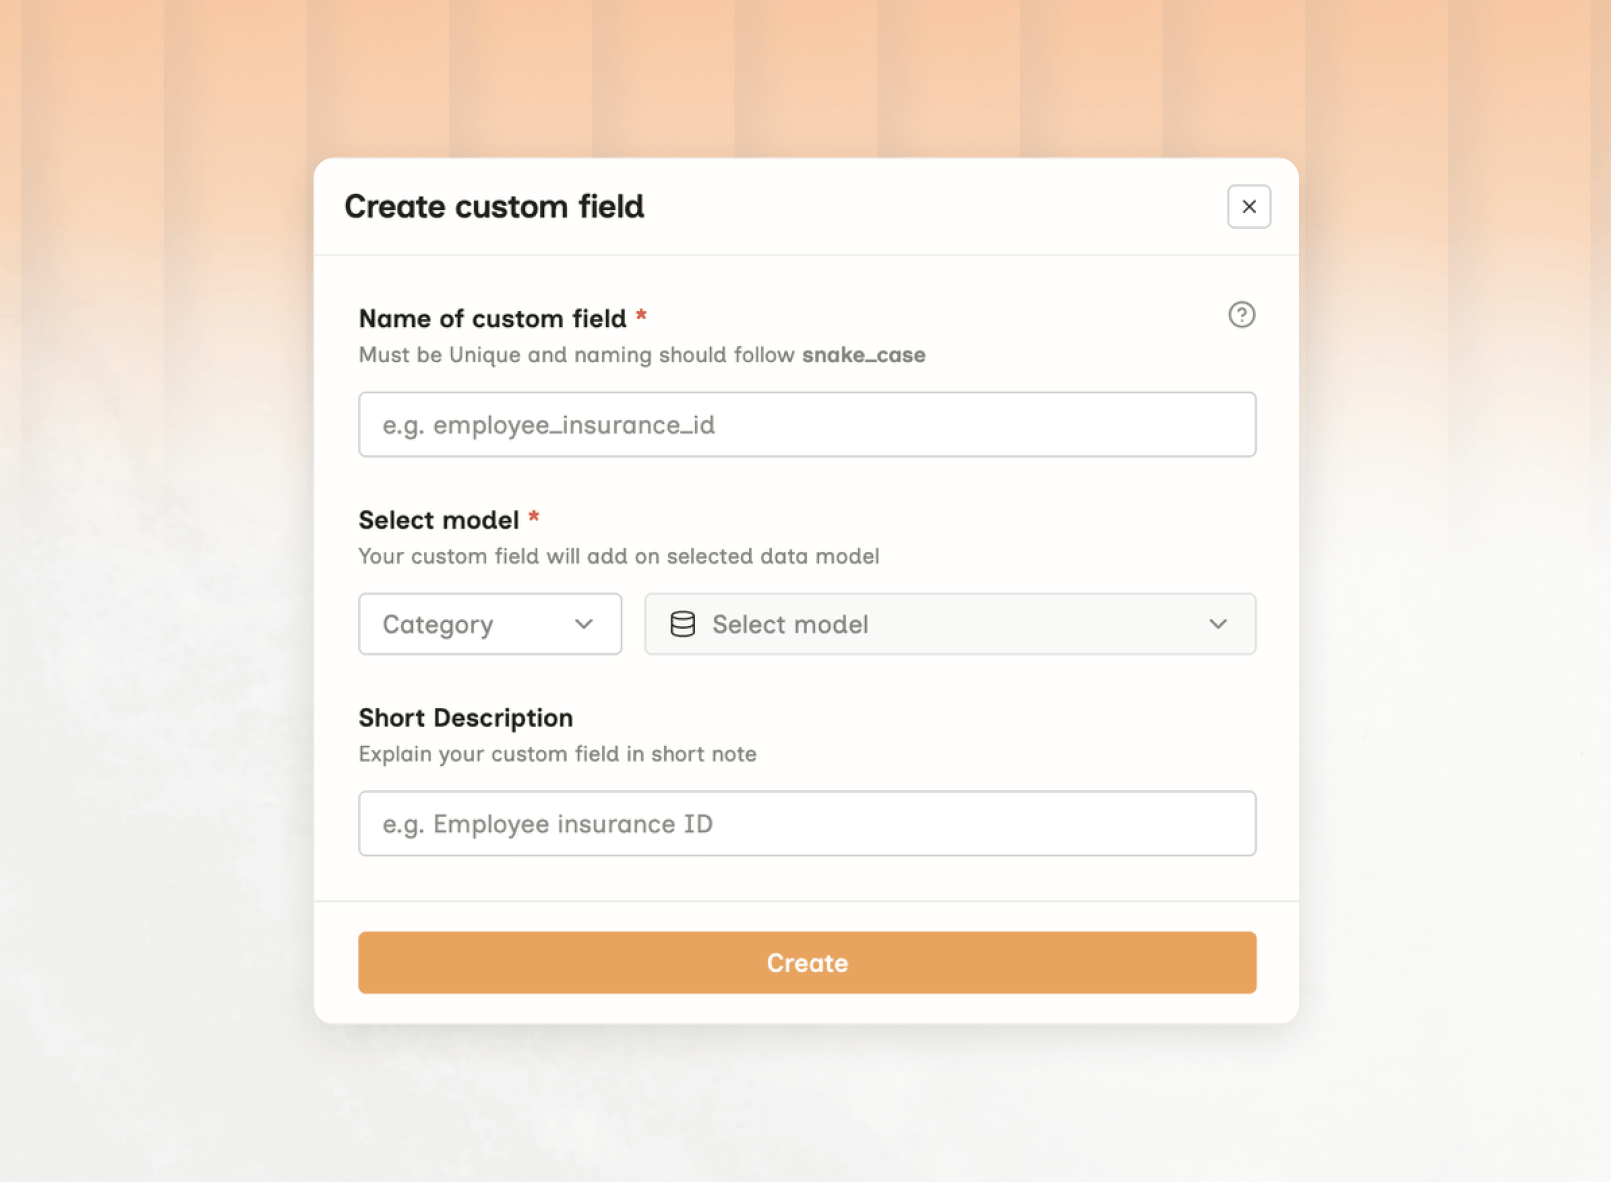
Create custom field dialog
Press Create. The field now exists but carries no data — it needs a mapping.
Step 2: Choose the mapping type
You land on the field’s page, which prompts you to create the first mapping. The two options are the two mapping types.
Where both exist for the same field, the connector mapping wins on that connector — see Type of mapping.
Step 3: Pick the source
A mapping row has three parts: Mapping type, Source, and Data field. For a connector mapping, the Source dropdown is a searchable list of your connectors: For an integration mapping, it is the integration itself: Use Add new to give one field several mappings — different connectors, or a connector override alongside an integration default.Step 4: Select the data field
Click the Data field box to open the picker. It has two tabs.Live data
Search a real employee, then choose a value from their raw payload. Because you can see the actual value, this is the surest way to confirm you are mapping the right key.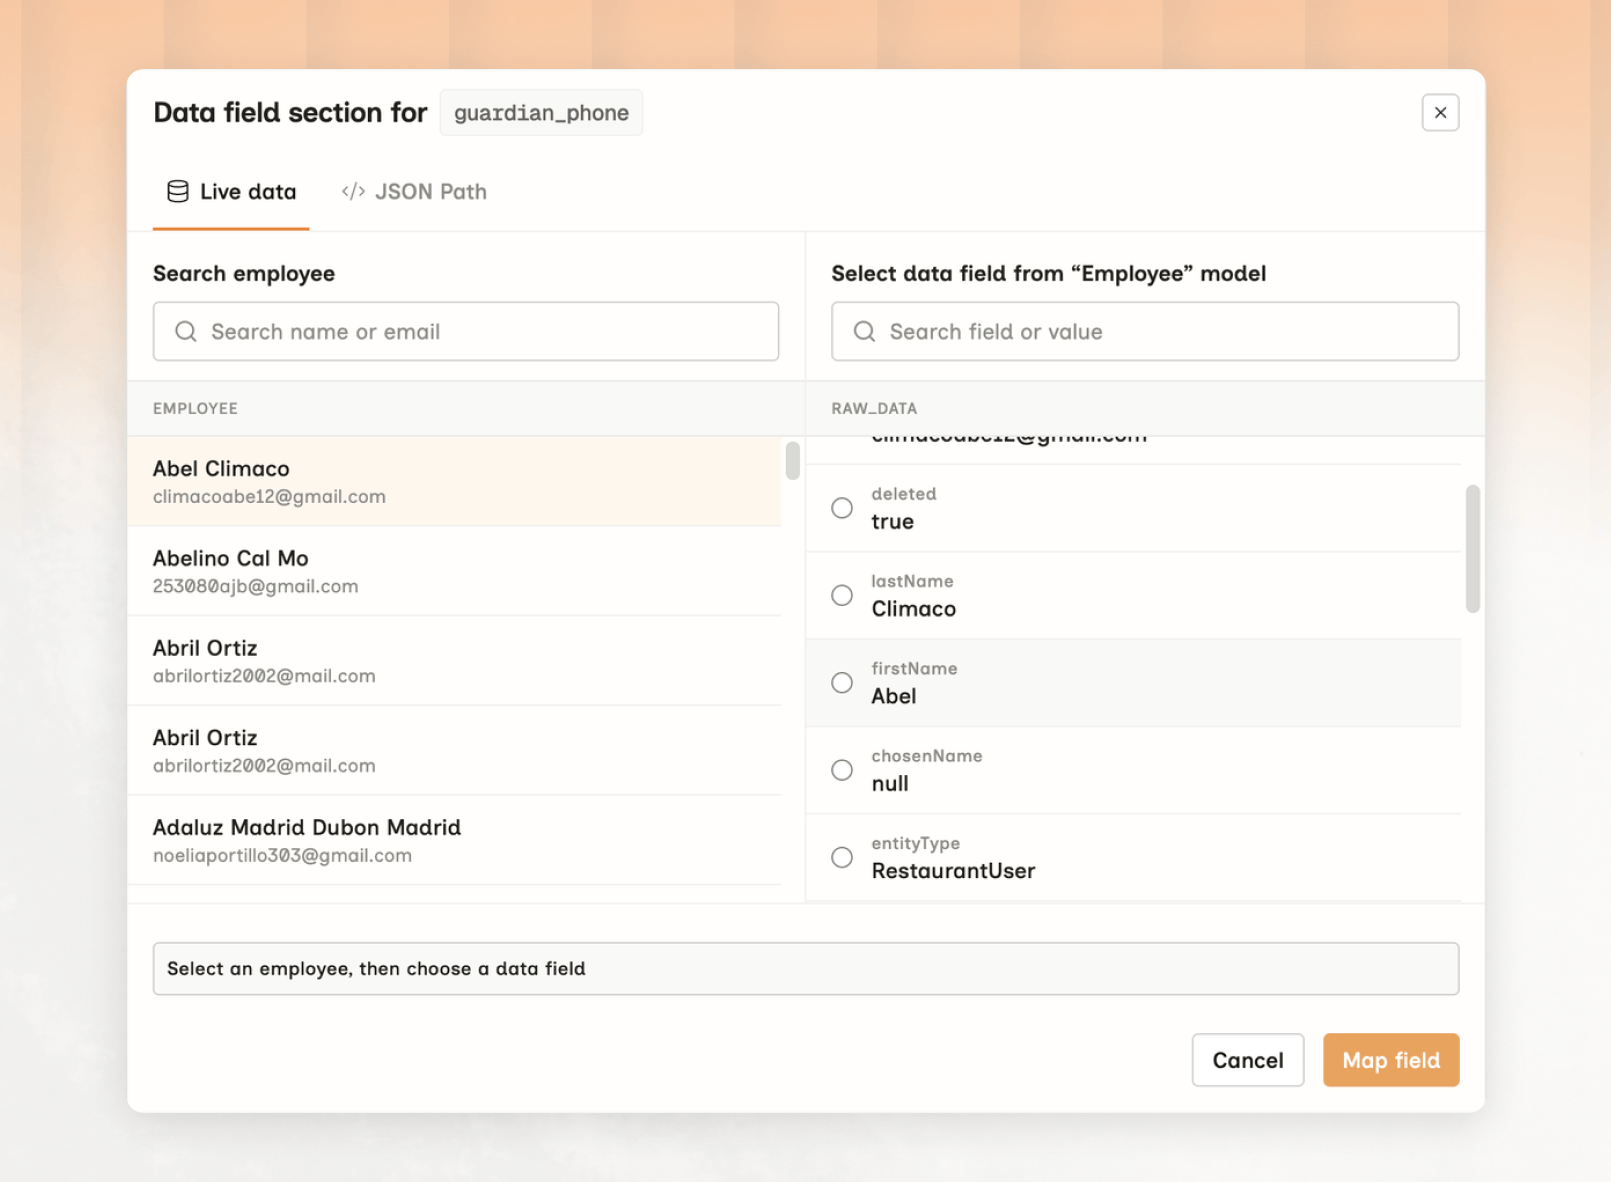
Live data. Pick an employee on the left, then a field from their raw data on the right.
JSON Path
Browse a sample payload and select the field you want, or switch to Enter path and type the expression directly. What the sample shows depends on the mapping type. A connector mapping shows that connector’s own data: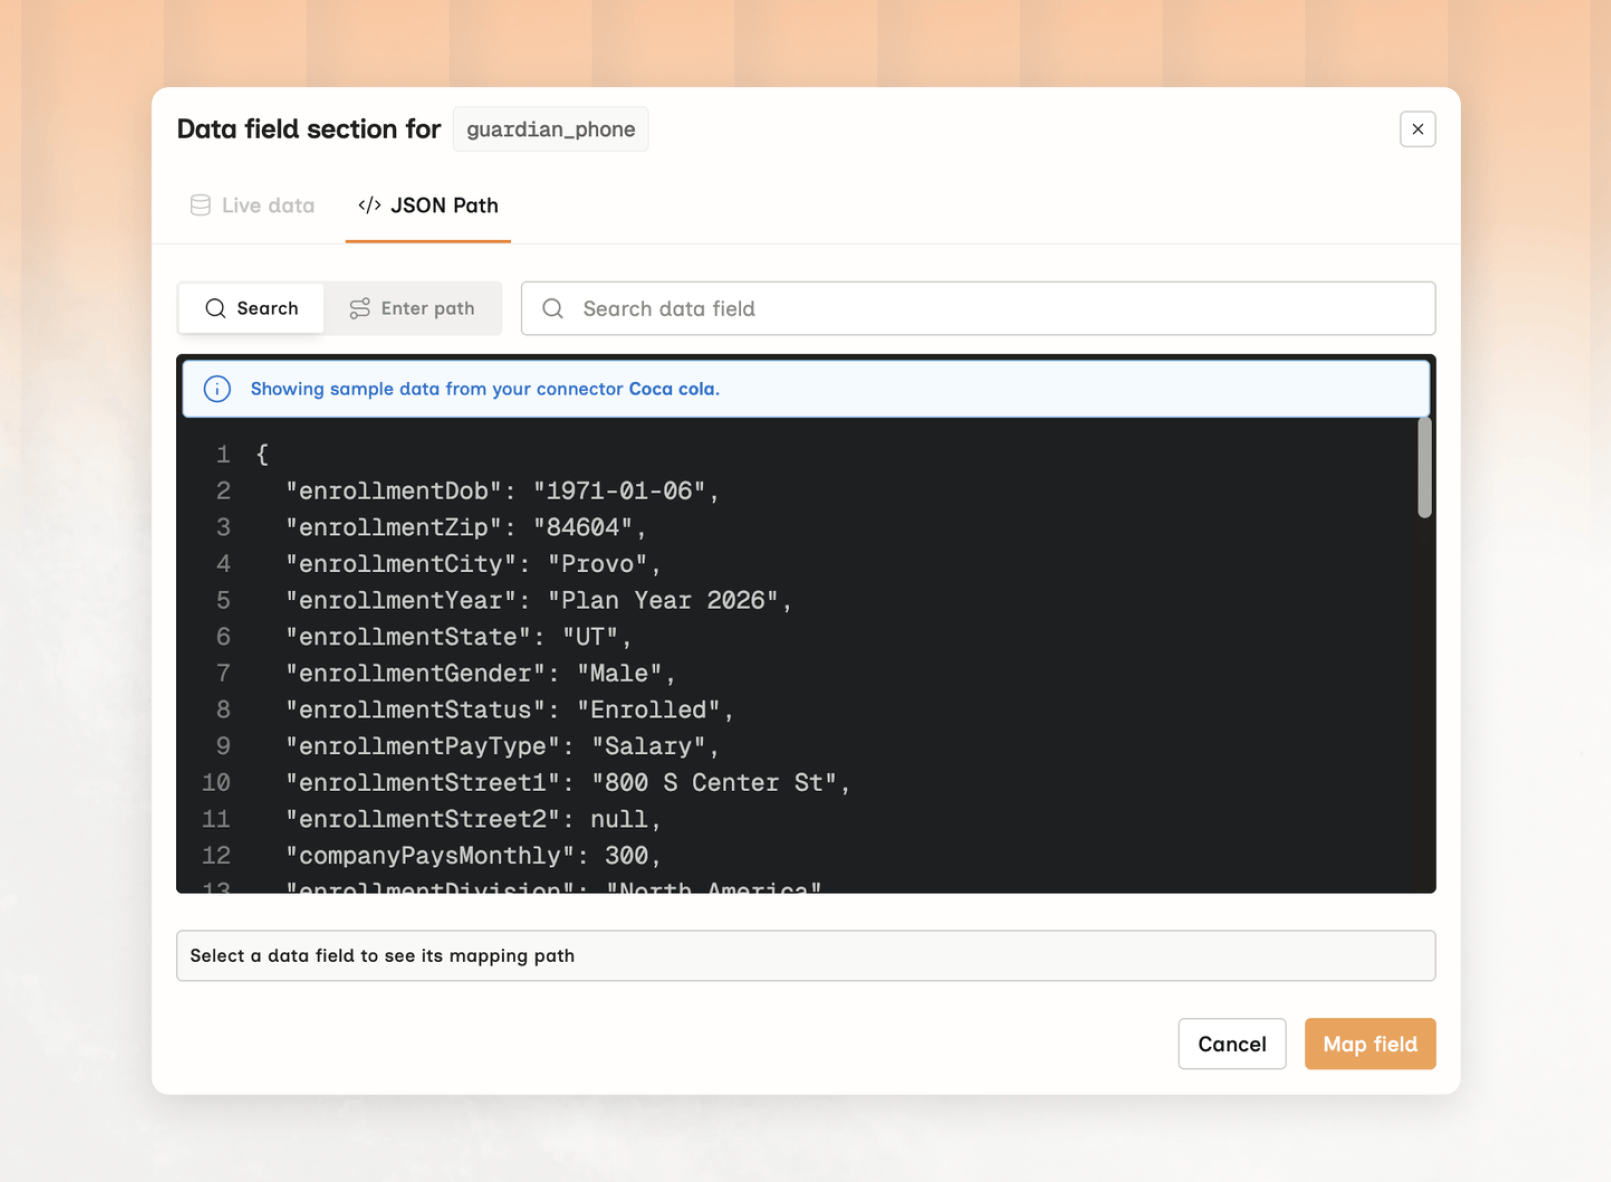
A connector mapping previews sample data from that specific connector.
Structures differ between integrations. An expression that works on one platform will not necessarily work on another, so check each integration you map rather than assuming the shape carries over.
When the value appears
The field is populated on the connector’s next sync, not immediately. To see it sooner, use force a resync. Once it resolves, request it withinclude_custom_fields=true — see Retrieve custom fields. Confirm the mapping resolves before relying on it: an incorrect path returns INVALID_JSON_PATH rather than an error.
Next steps
Retrieve custom fields
Add
include_custom_fields=true to your unified requests.API Configuration
Do the same thing programmatically.