

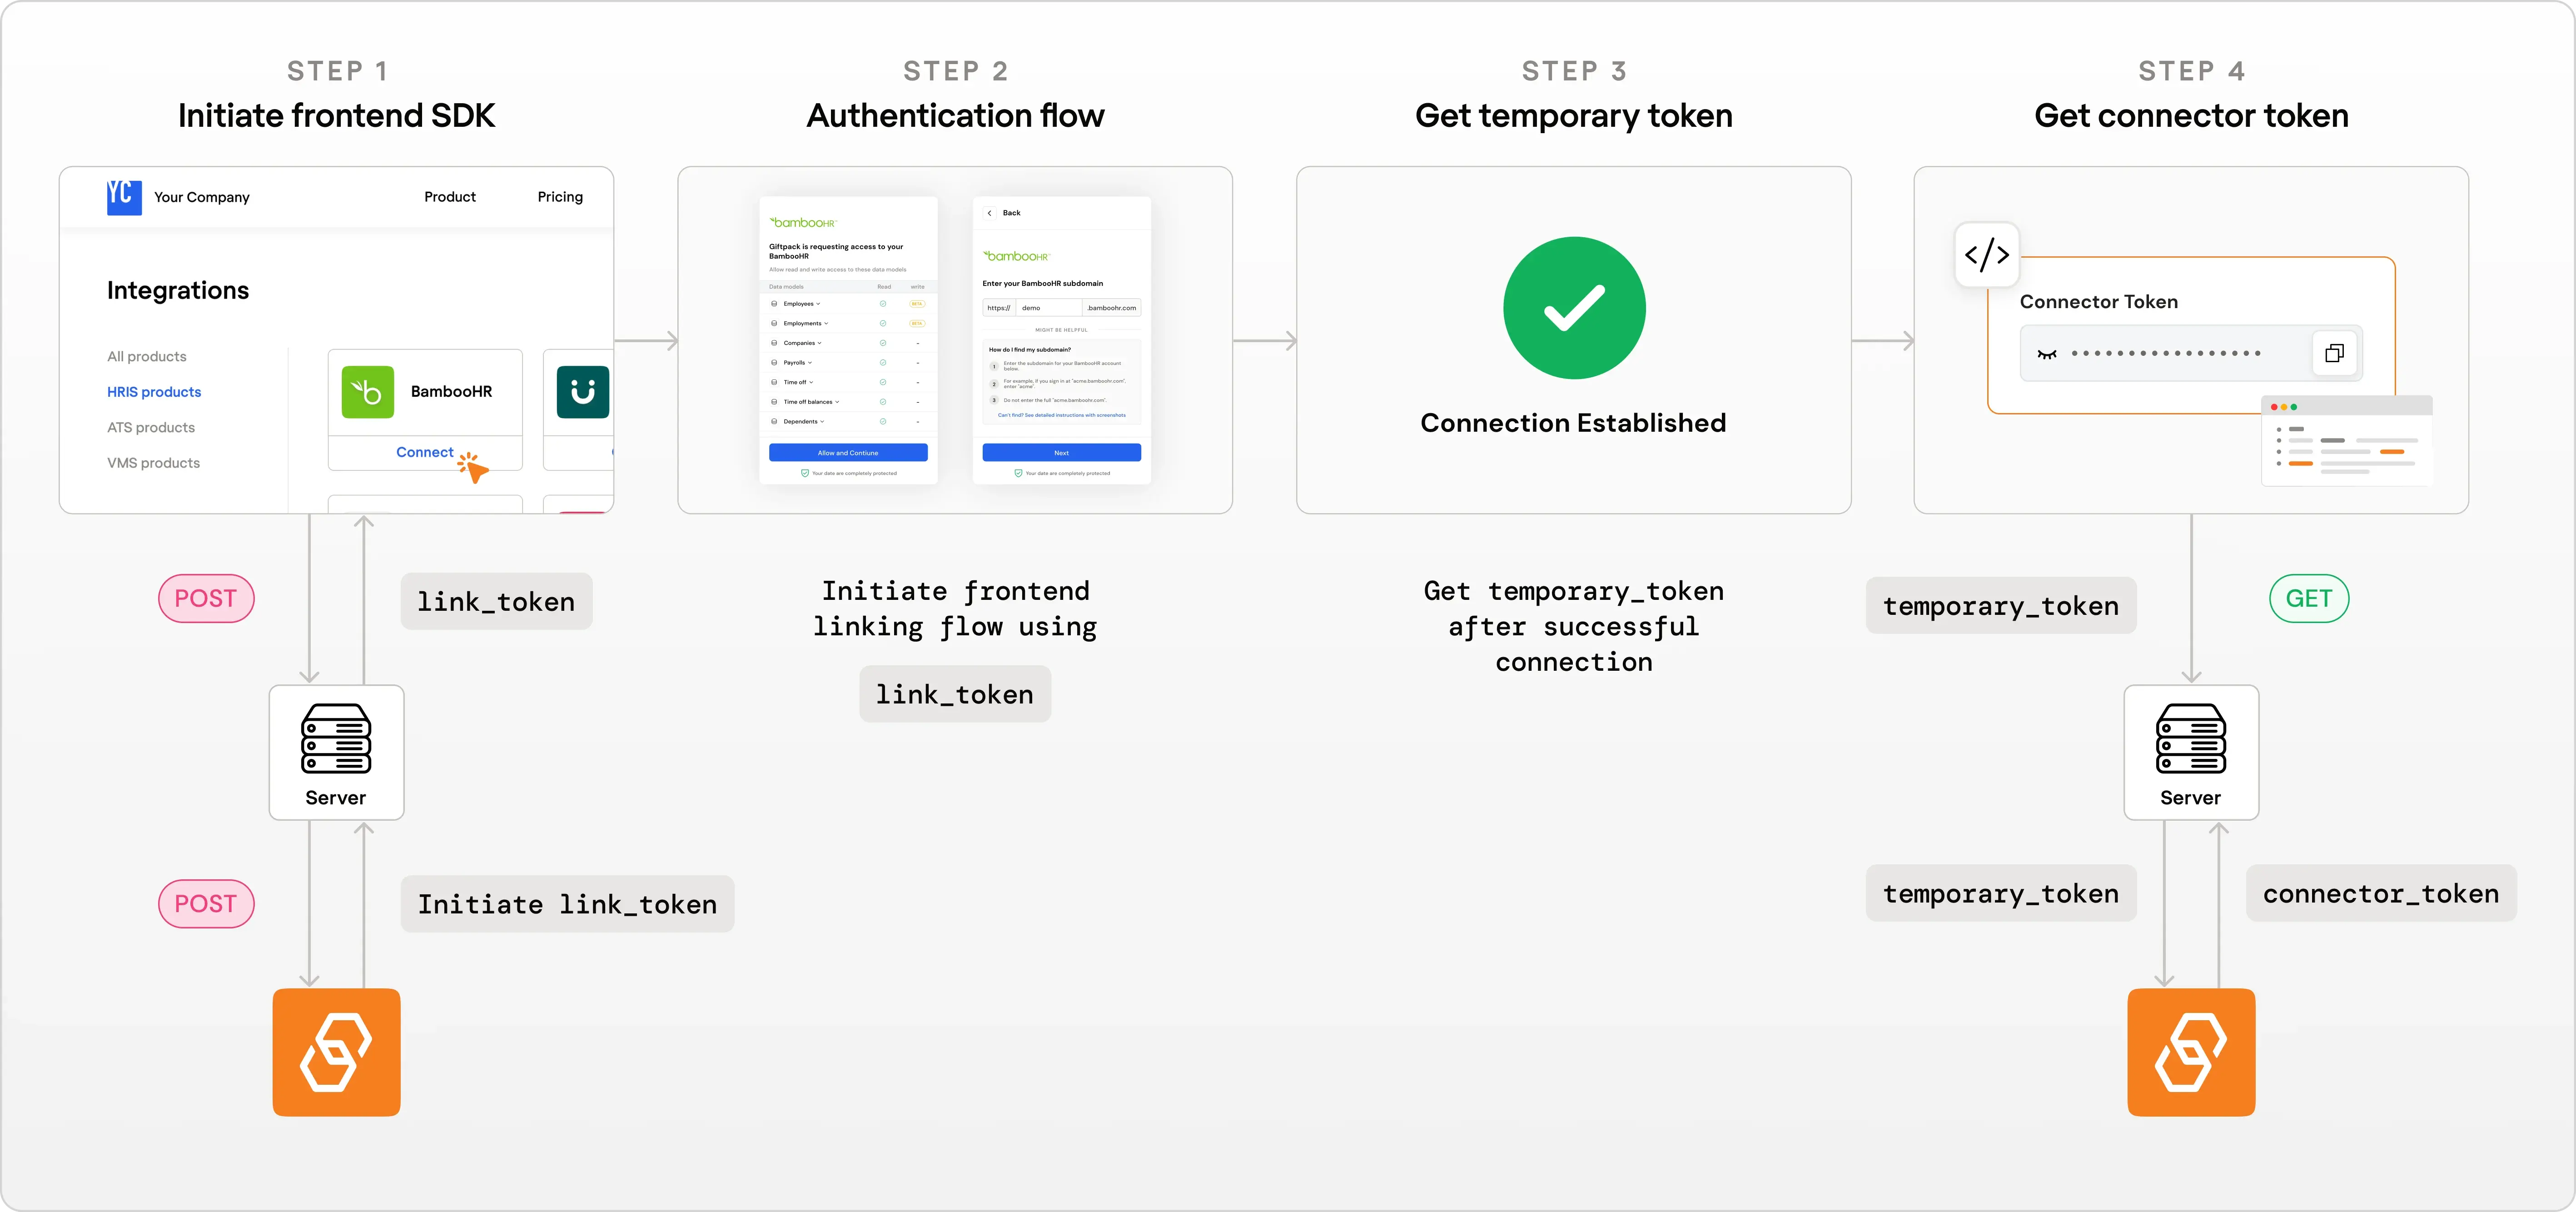
The full round trip: your server creates a link token, the user authorizes in the overlay, and the temporary token that comes back is exchanged — server-side again — for the connector token you store.
Step 1: Create a link token
A link token authorizes one linking session for one end user. Full reference: Create Link Token.Step 2: Open the link flow
Pass the token to the SDK. Opening the flow mounts a full-screen overlay on top of your app, where the user signs in to their HR system and authorizes access.- React
- JavaScript
App.jsx
{ open }. Call it from a click handler.Register one instance per page. A second one logs an error and will not behave predictably. In React, lift the hook to a shared parent if several places need to trigger it.
Step 3: Exchange for a connector token
The temporary token fromonSuccess is not an API credential. Send it to your backend and exchange it for the real one. Full reference: Get Connector Token.
Response
connector_token against the customer record you identified with origin_id. It is the credential every later call uses, as the X-Connector-Token header on unified endpoints, Passthrough, and custom fields.
This exchange uses your API key, so it belongs on your server too. Treat the returned connector_token as a secret: it grants access to that customer’s HR data.
Behavior worth knowing
Errors
Related
npm package
@bindbee/react-link on npm.Authentication
API keys and connector tokens.
Webhooks
Get notified when a new connector finishes its first sync.
Docs MCP
Point your AI assistant at these docs while you build.