

Add Bindbee Embed in your product
Bindbee Embed uses four steps to securely authenticate your customer’s integrations and allow you to embed the entire magic link flow inside your own product. Step 1: Generate alink_token to initialize a Bindbee Embed session for your end user.
Step 2: Embed Bindbee Embed in your frontend using your frontend (using either React SDK or JavaScript CDN).
Step 3: Retrieve a temporary_token upon successful integration.
Step 4: Exchange the temporary_token for a connector_token, which authenticates future requests to the Unified API.
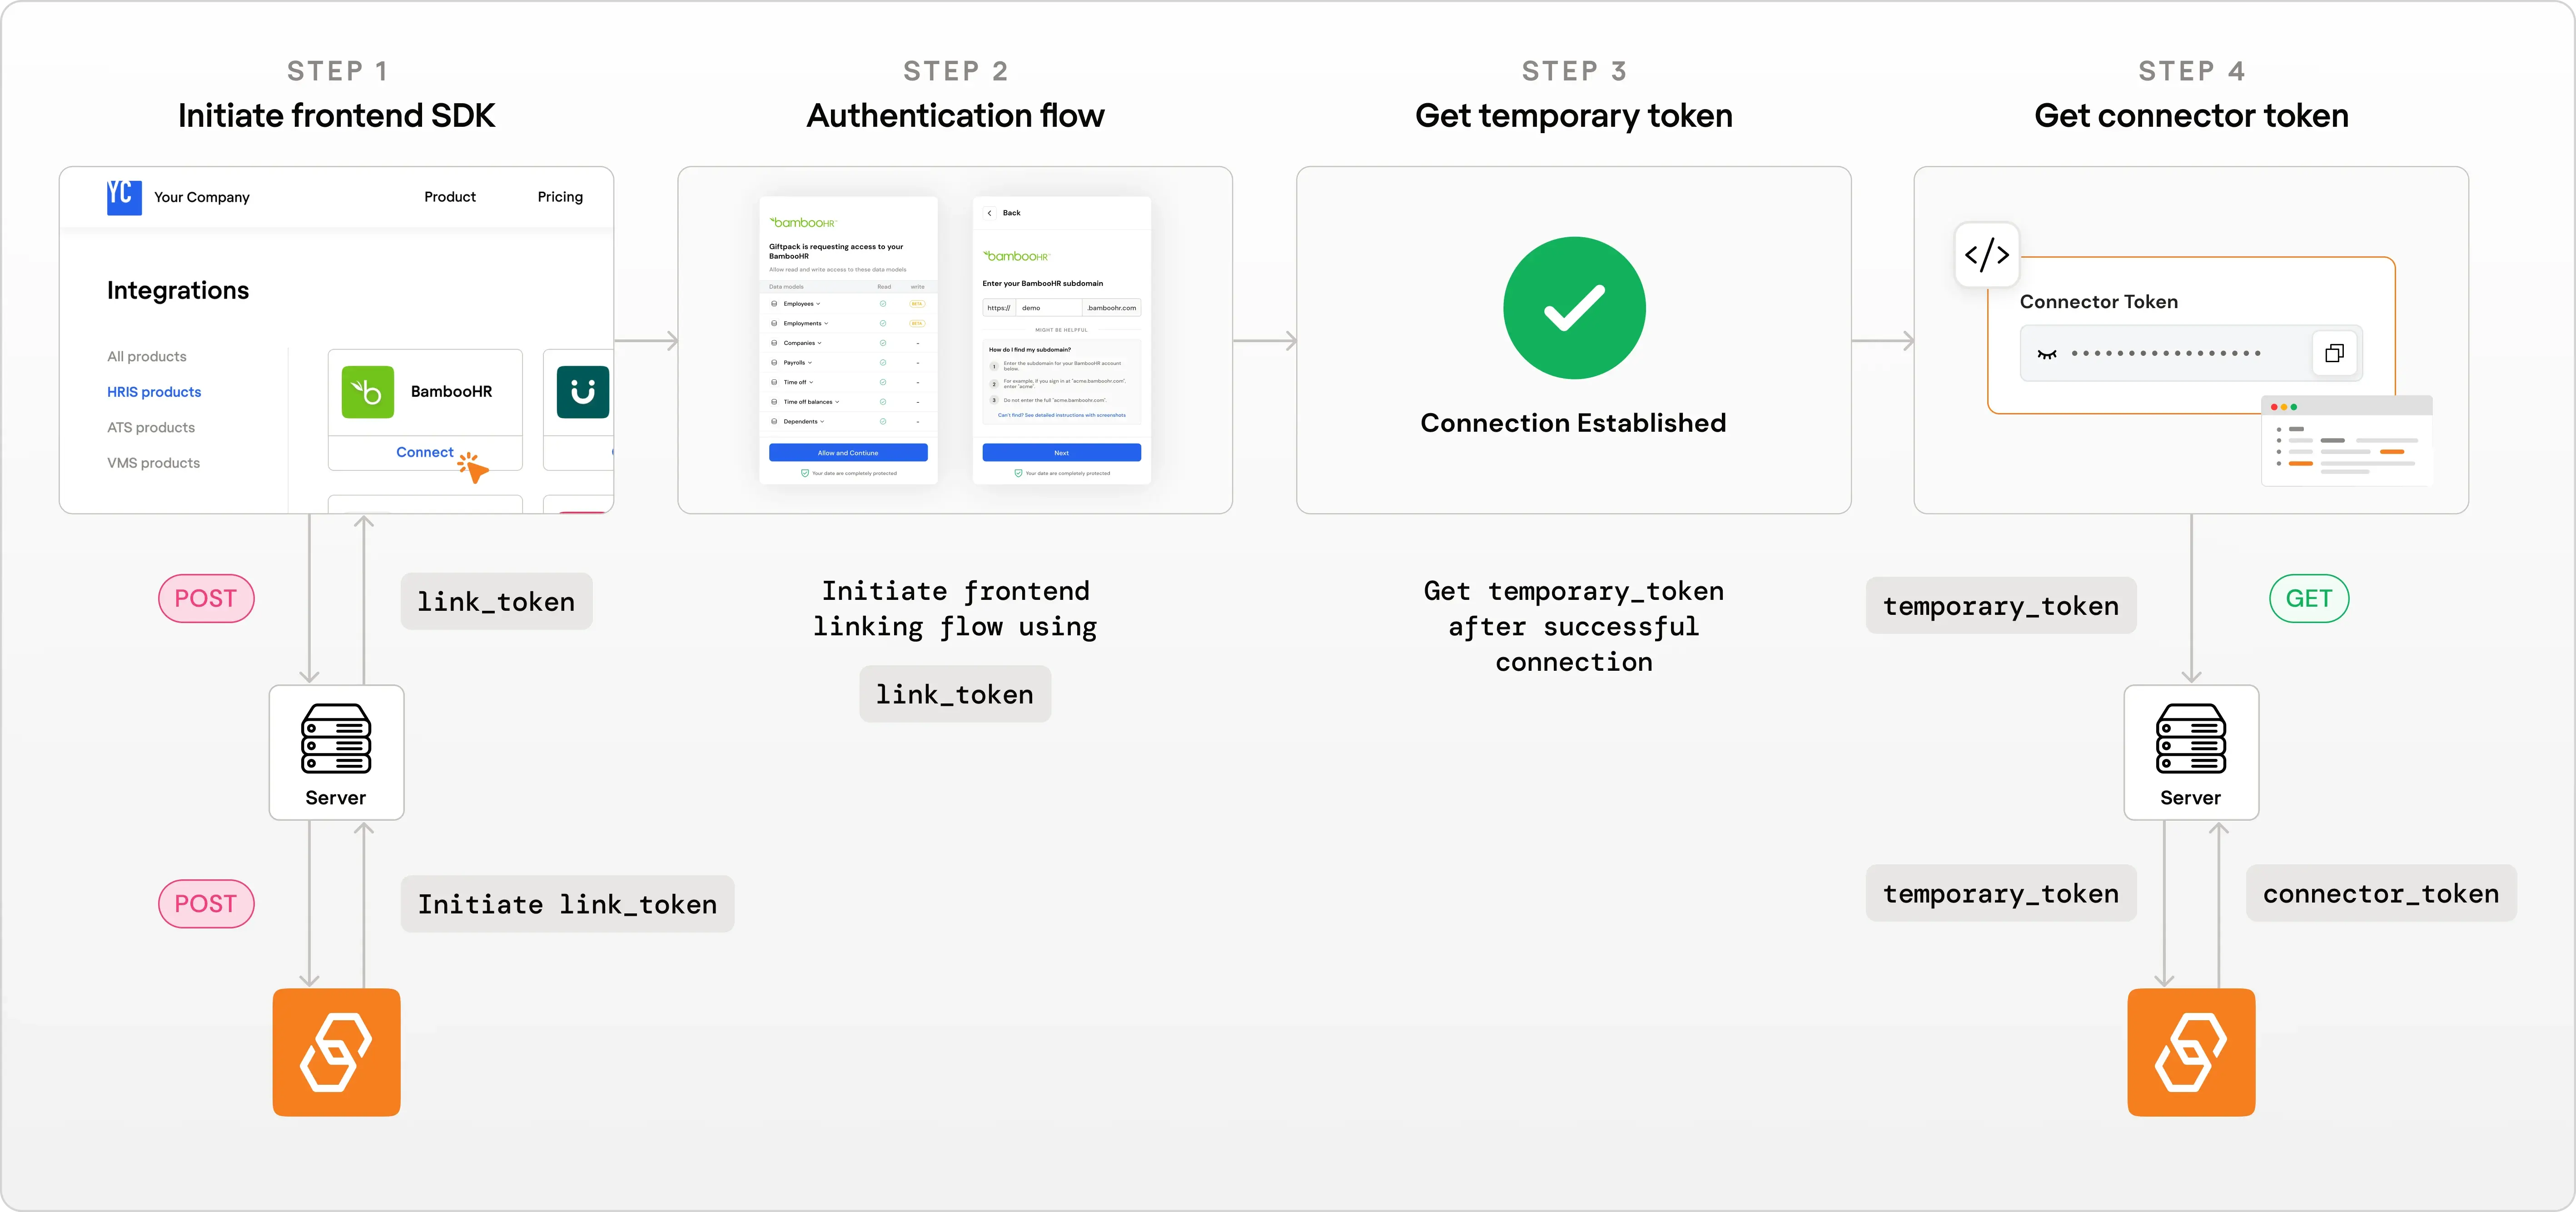
Step 1: Generate link_token
To start, generate a link_token by making a POST request to the following endpoint: https://api.bindbee.dev/api/embedded/v1/link/create-link-token.
What is a link_token?
A link_token is a unique code that allows you to start the linking process for integrating with third-party services like HRIS, Payroll, LMS or ATS systems.
Generating the link_token?
You will need BINDBEE_API_KEY for authentication.
You will also need to send some information about end user, integration category, and the specific integration you want to connect to.
How to get Integration Category and Name?
To get the category and Integration name refer to Integrations pageStep 2: Embed Bindbee Embed in your product
You can implement Bindbee Embed using either the React SDK or our JavaScript CDN approach.Option A: Using React SDK
If you are using React for your frontend, you can easily integrate the linking flow using our React SDKInstallation
Run one of the following commands in your React project directory:npm install --save @bindbee/react-link
or
yarn add @bindbee/react-link
How to use the SDK?
Import theuseBindbeeMagiclink hook and integrate it into your React application. Here’s an example:
How it works?
useBindbeeMagiclinkis a hook that handles the linking flow which takes following parameters as input:linkTokenis the token generated in Step 1.serverUrlis optional parameter used to specify region. eg. use ‘https://api-eu.bindbee.dev’ to use eu region.onSuccessis a callback function that is called when the linking process is successful.onCloseis an optional callback function that is called when the user closes the linking flow.
Option B: Using JavaScript CDN
If you’re using a framework or library other than React for your frontend, you can seamlessly integrate the linking flow using our JavaScript CDN.Installation
Add the following script tag to your HTML:HTML
The
integrity attribute ensures that the script has not been tampered with by verifying its cryptographic hash. The crossorigin="anonymous" attribute is required for Subresource Integrity (SRI) checks on CDN-hosted scripts.You can also use the unminified CDN link if the previous URL doesn’t work:
HTML
Usage
Here is a sample JavaScript code snippet for the implementation.JavaScript
HTML implementation example
Here’s a complete HTML code snippet for the implementation, including the JavaScript code:HTML
Step 3: Get temporary_token
After a successful linking process, you will receive a temporary_token. This token is used to retrieve the connector_token.
Step 4: Get connector_token using the temporary_token
To get the connector_token, make a GET request to the following endpoint: https://api.bindbee.dev/api/embedded/v1/connectors/connector_token/{temporary_token}
You will need BINDBEE_API_KEY for authentication.
What is connector_token?
connector_token is required for authorizing your Bindbee API requests effectively. for more information about connector_token you can refer here
Getting the connector_token?
Here’s an example on how to get the connector_token: