> ## Documentation Index
> Fetch the complete documentation index at: https://docs.bindbee.dev/llms.txt
> Use this file to discover all available pages before exploring further.
# Quickstart
> Create a connector, sync it and make your first Bindbee API call.
## Prerequisites
* A Bindbee account. Access is provisioned during onboarding. If you don't have access, email [Bindbee Support](mailto:support@bindbee.dev).
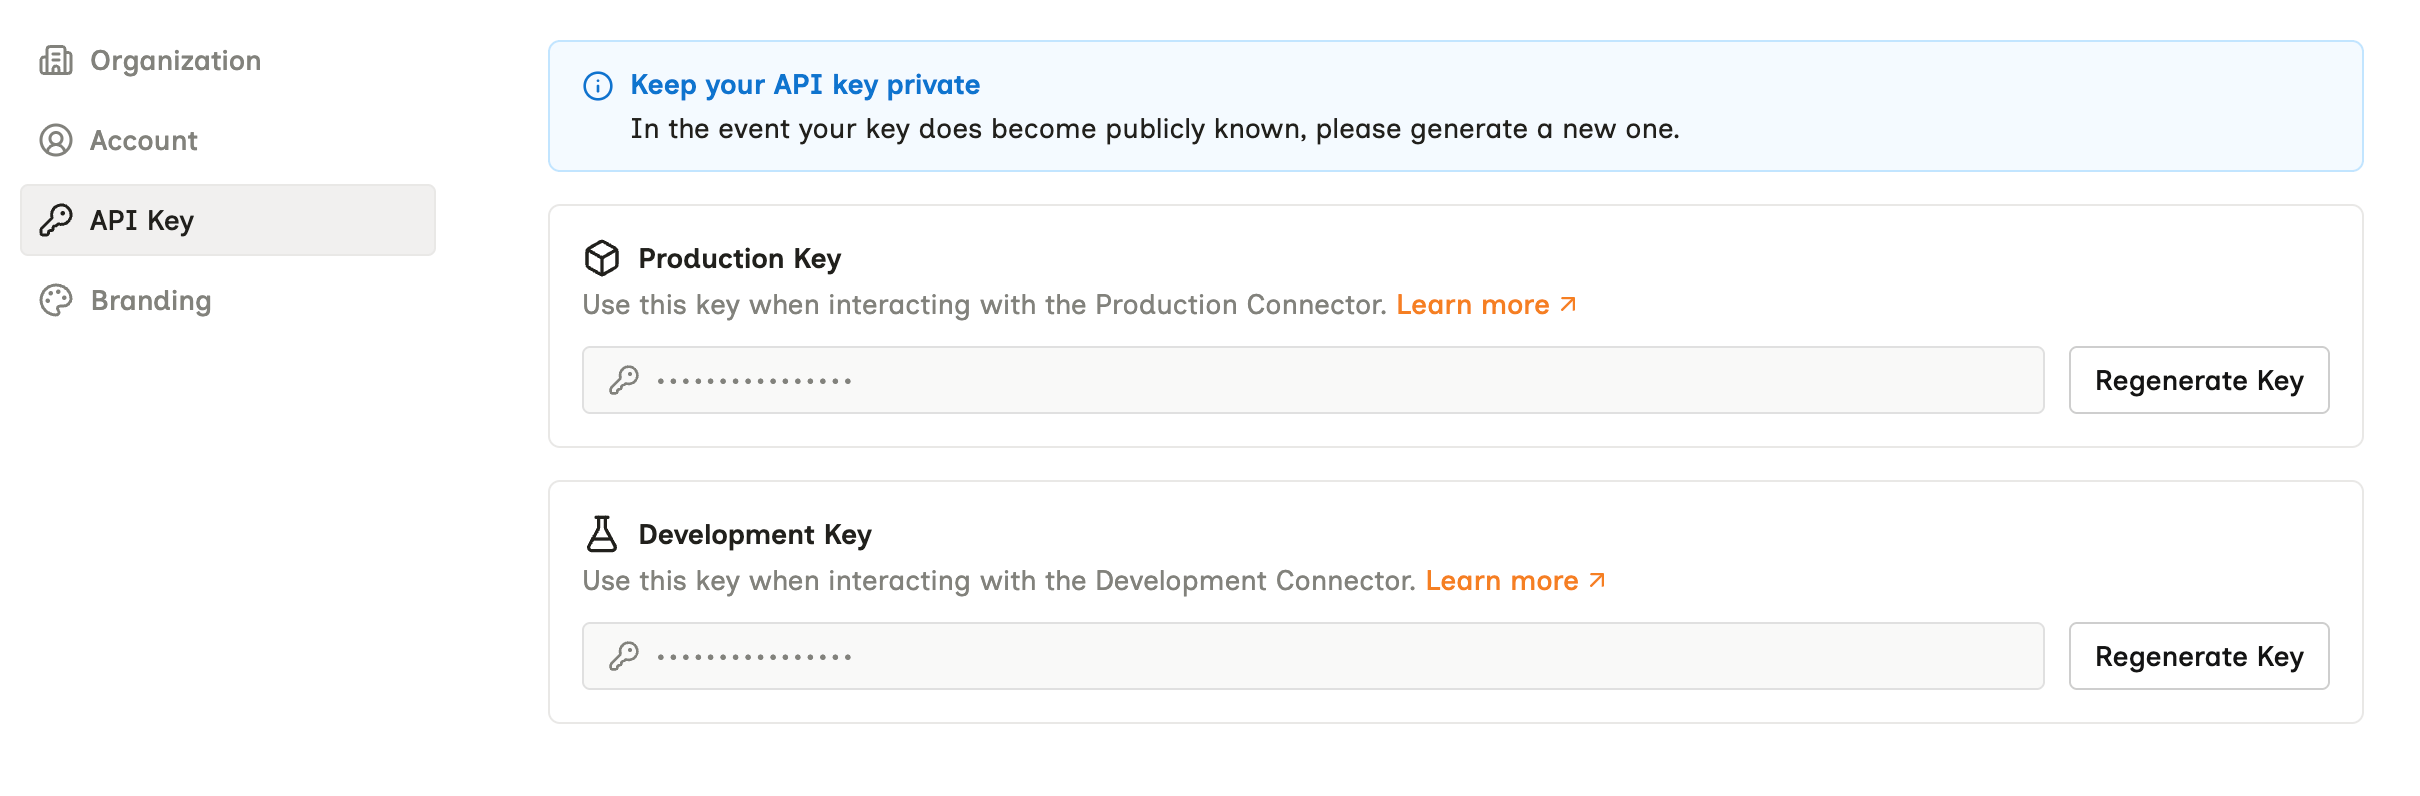
* Your **Development API key** from [Bindbee Dashboard](https://app.bindbee.dev/settings/keys).
 ***
## Steps
Go to [app.bindbee.dev](https://app.bindbee.dev), open **Connectors**, and switch to the **Development** tab.
***
## Steps
Go to [app.bindbee.dev](https://app.bindbee.dev), open **Connectors**, and switch to the **Development** tab.
 **Result:** You are on the tab test connectors are created from.
Press **+ Test Connector**, then pick a category and an integration - for example **BambooHR** under HRIS.
**Result:** You are on the tab test connectors are created from.
Press **+ Test Connector**, then pick a category and an integration - for example **BambooHR** under HRIS.
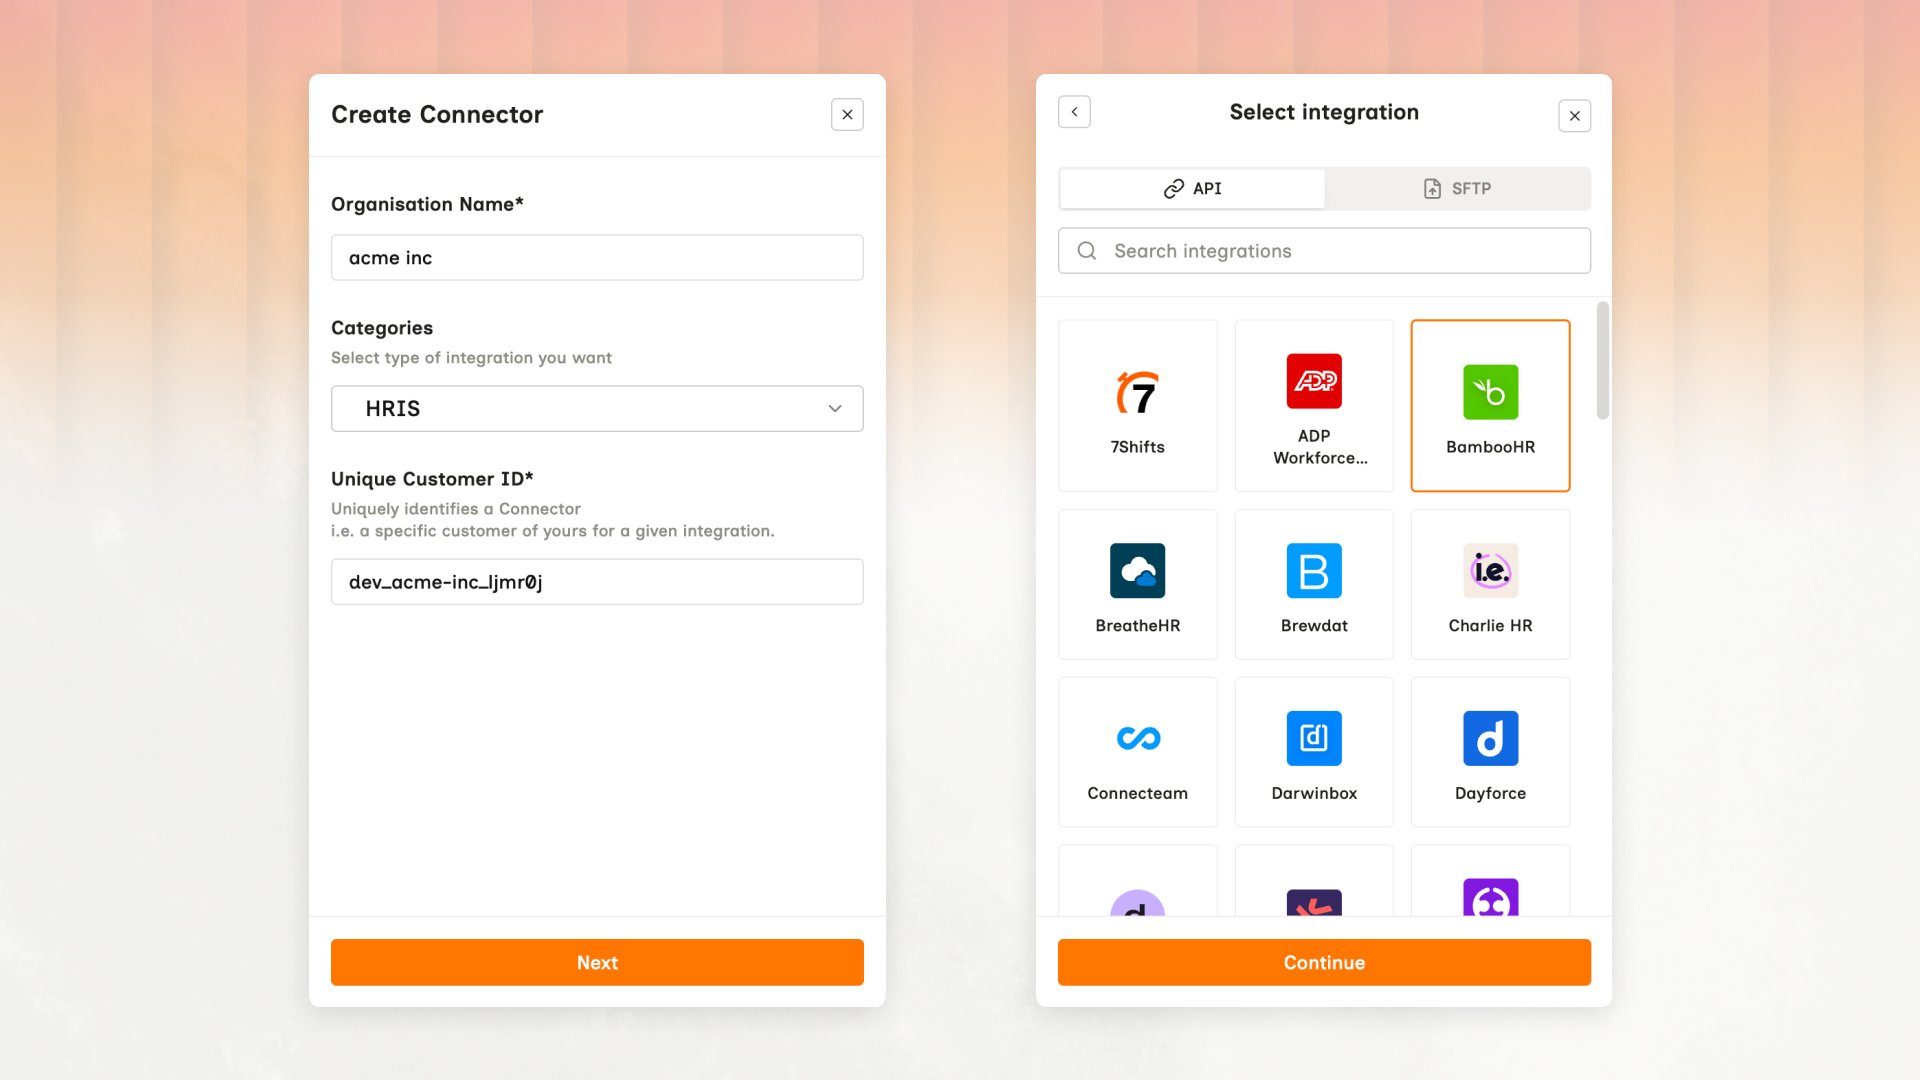 **Result:** The form carries the Unique Customer ID that maps this connector back to your own customer record.
Follow the prompts to complete authorization.
**Result:** The form carries the Unique Customer ID that maps this connector back to your own customer record.
Follow the prompts to complete authorization.
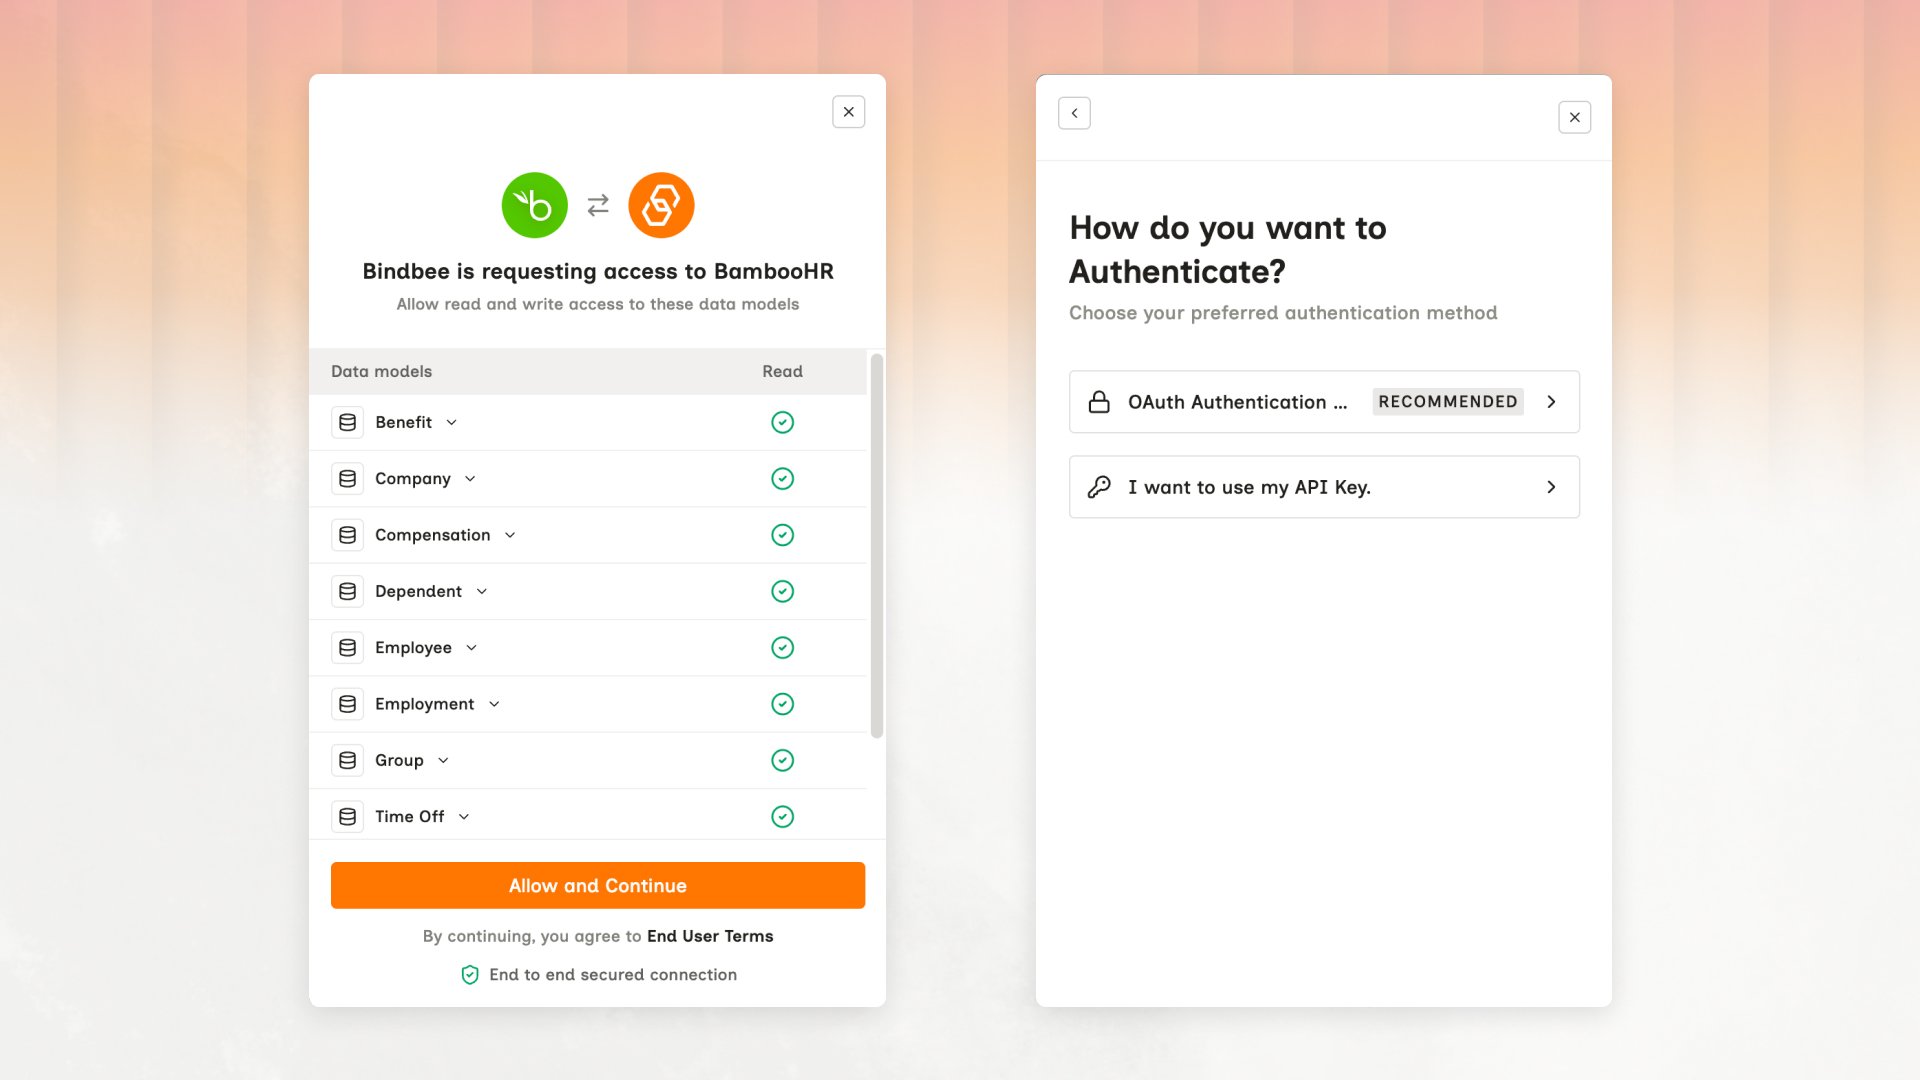 It depends on the integration you pick. Some work with a demo account. Others need a real one - for BambooHR, a free [trial account](https://www.bamboohr.com/signup/h2) works.
**Result:** The connector exists, and its initial sync has started.
Open the connector and copy the `connector_token` from the **Overview** tab.
**Result:** You have the token that tells Bindbee whose data to return.
The initial sync is a full read of every model in scope. It usually finishes in a couple of minutes.
On the same **Overview** tab, watch the **Sync** panel until the run's **Status** reads **Synced**.
It depends on the integration you pick. Some work with a demo account. Others need a real one - for BambooHR, a free [trial account](https://www.bamboohr.com/signup/h2) works.
**Result:** The connector exists, and its initial sync has started.
Open the connector and copy the `connector_token` from the **Overview** tab.
**Result:** You have the token that tells Bindbee whose data to return.
The initial sync is a full read of every model in scope. It usually finishes in a couple of minutes.
On the same **Overview** tab, watch the **Sync** panel until the run's **Status** reads **Synced**.
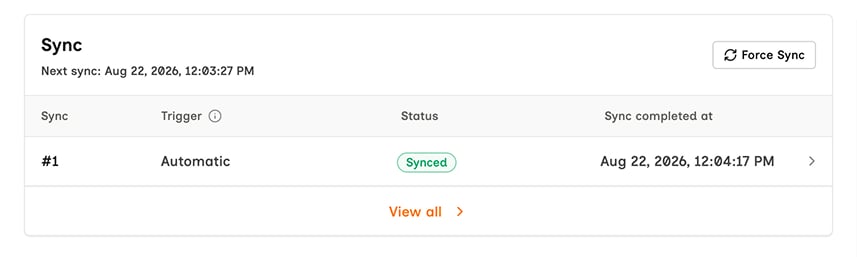 **In Development, only the first sync runs on its own.** After that, press **Force Sync** or call [Force sync a connector](/api-reference/connectors/resync-connector) to get fresh data.
**Result:** The run reads **Synced**, and the connector's data is ready to query.
Send a `GET` request to the Employees endpoint:
```bash theme={null}
curl https://api.bindbee.dev/api/hris/v1/employees \
-H "Authorization: Bearer " \
-H "X-Connector-Token: "
```
Every field the response can carry, with a sample payload, is on [Get Employees](/hris/employee/get-employees).
**Result:** A `200` carrying employees, normalized out of that system.
***
## What just happened
1. You created a **connector** - one authorized connection to one source system.
2. You **synced** it, pulling that system's data into Bindbee.
3. You called the **Unified API** with your API key and the connector token, and got normalized data.
In production two things change: connectors sync on a schedule rather than on manual trigger, and your end users create them through Magic Link or Embedded SDK rather than you entering credentials. See [How to connect](/get-started/how-to-connect).
***
## Related
Magic Link, Connectors, Logs, Custom Fields, Webhooks and the Changelog - where each lives.
Authentication, pagination, rate limits and sync frequency.
Narrow the models and fields Bindbee requests from every system.
Subscribe to a webhook so your application stops polling.
**In Development, only the first sync runs on its own.** After that, press **Force Sync** or call [Force sync a connector](/api-reference/connectors/resync-connector) to get fresh data.
**Result:** The run reads **Synced**, and the connector's data is ready to query.
Send a `GET` request to the Employees endpoint:
```bash theme={null}
curl https://api.bindbee.dev/api/hris/v1/employees \
-H "Authorization: Bearer " \
-H "X-Connector-Token: "
```
Every field the response can carry, with a sample payload, is on [Get Employees](/hris/employee/get-employees).
**Result:** A `200` carrying employees, normalized out of that system.
***
## What just happened
1. You created a **connector** - one authorized connection to one source system.
2. You **synced** it, pulling that system's data into Bindbee.
3. You called the **Unified API** with your API key and the connector token, and got normalized data.
In production two things change: connectors sync on a schedule rather than on manual trigger, and your end users create them through Magic Link or Embedded SDK rather than you entering credentials. See [How to connect](/get-started/how-to-connect).
***
## Related
Magic Link, Connectors, Logs, Custom Fields, Webhooks and the Changelog - where each lives.
Authentication, pagination, rate limits and sync frequency.
Narrow the models and fields Bindbee requests from every system.
Subscribe to a webhook so your application stops polling.